Showing posts with label Vintage Sewing. Show all posts

Monday, 24 March 2014

MARCH MENDING

At the beginning of the year I set myself sewing goals. The post on this can be found here. For the first two months I achieved them with ease. However, for March I have deviated. Instead of following the list, I have found contentment in mending, in finishing all of those unfinished projects. Okay, I have not finished them all, yet I am finding a sense of growing happiness at the lessening of the "to do pile" and the growing of the 'done' pile.


Red Gingham Dress, is still there waiting to be finished, you can see her under a stash of fabrics that I am turning into baby wraps.

I have still managed to sew at least one, or more item per week, yet I have not posted about it. I have not practiced or learnt a new skill this month. Or sewn using my vintage patterns, yet I have been making for someone other. This last item is the thing that is bringing such happiness. That act of giving for no reason other than I want to. 


My boxer shorts are traveling around the globe for other people to wear. 

Sunday, 23 February 2014

RED GINGHAM DRESS MISS 1970S BODICE

With me working pretty much every day last week, I had no time for blogging, and definitely no time for sewing. However, Saturday after I had spent the day paving, I snuck in some me time Saturday night once Jarvis was in bed. (Justin photographed Soundwave all day/night Saturday. So I had the house to myself.)

 Front

Last week I cut the dress out. First off I sat down and read the instructions... hmm not much help/instructions, so it all was a bit of a guess. Miss 1970 proved to be a tricky woman, not sure if it was over-tiredness or she is just a difficult woman? My biggest challenge was, once I  basted the pieces together to check the fit, I realised then a 1970s size 12 was massive on me and I needed to take at least five centimetres off both sides. Which then bought the challenge of re-working the darts.

Pinning on yourself is no easy task, especially after I had spent the day paving and my back and arms muscles felt like jelly. But now, it seems to fit really well. I am super excited for the next step of attaching the skirt and skirt underlay!

Two more naps and I may get this dress done. I just have to decide if I am going to use bias binding on the hem as well?

 Pieces before the five centimeters off both sides

Back


Sunday, 16 February 2014

RED GINGHAM DRESS CUT OUT

In keeping with my sewing resolutions for this year I rummaged through my fabric stash and my vintage pattern stash and found this combination. It is going to be Miss 70s meets Miss 50s with a touch of my pattern drafting throwing in.


The skirt is all Miss 5os. The bodice, well the front is Miss 70s and the back is my drafting. The original Miss 70s had a high square back and I have altered it to a lower V shaped back. I also added an extra five centimetres to the bodice length as I am long waisted. 

I am using a red cotton gingham lined with a white poly cotton. One nap was drafting and cutting. Yes, I measure my sewing in nap times. I think I am going to need a few naps to get this finished.


Monday, 13 January 2014

SEWING GOALS FOR 2014

I have opted to list my sewing goals on here to try to keep myself accountable. This list is simple.


* Sew one item a week post it online
* Practice one new sewing skill per month
* Sew one item per month for someone other (more on this later)
*Sew items from my vintage pattern collection (what is the point in having them if I do not use them?)

I have kept the list as simple as possible, as some weeks finding time for myself does not happen, and this includes sewing. Last week was one of those weeks, with extra hours at work and a long list of injuries- chest, toe, burnt arm, twisted ankle, I had very little time at the machine.

Though, I did get to complete a skirt for Jarvis's bed. This was to hide the trundle/spare bed underneath. Justin's pick of fabric was orange with white stars on a black base. Which as you can see coordinates perfectly with the rest of his room.

Jarvis has a beautiful handcrafted patchwork quilt (in black and white), once he stops co-sleeping and transfers into his room, the quilt will go on this bed. 

Note to self: At least attempt to tidy ruffle before taking a photo


I also got another pair of boxer shorts completed for Jarvis. So that ticks off list item one for this week :)


Thursday, 19 December 2013

IT"S WHAT IS ON THE INSIDE THAT COUNTS. HOW TO MAKE A FRENCH SEAM

I have not done a post on sewing of late, as a lot have been Christmas presents. However, I took a break from Christmas sewing about two weeks ago and made myself a skirt to wear for Jarv's birthday.


Rather than just showing another skirt I have made, I thought I would show the inside and reveal I am as OCD with my sewing as I am with cleaning.

All seams are finished on the overlocker, then turned to hide this by using a French seam. A French seam is often used when the fabric is too delicate to overcast the seam allowance to prevent raveling. The construction of a French seam provides a clean, finished, professional look to the inside of the garment. But I like to use this on most garment, regardless of fabric.


Step 1
Make note of the of the difference between the “right” and “wrong” side of the fabric you are using. With a French seam's construction, it requires that you be aware of the difference so that they are properly oriented in each step.

Step 2
With the right sides facing out, pin material together, pinning entire length of edge where the French seam will be. You will be sewing the seam to the outside of the garment in this step.

Step 3
Overlock, or machine sew the edge. If machining, use pinking shears to finish the edge.

Step 4
Unfold with the right sides up. Press entire length of trimmed seam allowance, pressing both edges flat and to one common side. DO NOT press seam open! Be sure to use a setting on your iron that will not damage the fabric. Okay for the sake of honest, here is where I admit I always skip this step. I have made it to 45 without ever owning an iron.

Step 5
Fold material along newly created seam with wrong sides out. Now you are working on the inside of the garment. 

Step 6
Press entire length of seam flat at fold on wrong side. Be sure to use a setting on your iron that will not damage the fabric. Again I skip this step

Step 7
With wrong sides out, pin folded material together, pinning entire length of pressed seam created in Step 6.

Step 8
Stitch a 3/8" seam allowance along the entire length of the edge pinned in Step 7. Remove pins after the seam allowance has been sewn.

Step 9
Unfold with the wrong sides up. Press entire length of seam flat to one side. Be sure to use a setting on your iron that will not damage the fabric. Or again skip this step if like me you hate irons.

Step 10
Give yourself a pat on the back. The OCD in you will be happy with the neat finished seams!

This does add some bulk when you are using a heavier fabric, yet because of the style if skirts/dresses I like and sew this does not matter.


Now in keeping with the honesty, I will show some of the images that happened. Okay, so I am no model!


Ha! Look at me being all serious and model like!!

Close up of the fabric.

Thanks goes to Tamika for taking the photos for me.


Wednesday, 13 November 2013

WHAT SIZE AM I?

What size are you? I have no idea what size I am! The other day I went shopping for the first time in three years, I needed a pair of black work pants. Even the shops did not know what size I am. I am anywhere from a size 6 through to a 12. In vintage clothing I can often be anywhere from a size 12 through to a 16.


I am sure any other female will be able to tell me that the sizing policy is inconsistent. This is due to all sorts of reasons; from some stores choosing to cut more generously- or tailor their clothes for curvier women- to the rise of vanity sizing, where clothes are labelled as small to give the customer a false sense of thinness. Or cheap clothing stores cutting their garments smaller. 

There has never really been a standard for women’s sizes, but years ago pattern sizes and ready-to-wear sizes were more or less the same. But over the past 30 years or so the sizes we see in stores have changed quite a bit. In general we are taller and fatter than previous generations, however, we wear smaller sizes!

As the sizing changed over time it would have been an epic challenge for pattern companies to change the sizes of sewing patterns to keep up, since the entire catalogue of available sizes would have had to be redone. As some sewing patterns stay in print for years. So now sewing pattern sizes don’t match up with the size labels in our closet, and this adds even more confusion.

I have spent the last two days attempting to draft patterns. I was going to make a small, medium and a large for customers who do not wish to have a custom fit, however exactly what is a small, medium and large? Do I make my sizes according to sewing standards? High End fashion standards? Or cheaper clothing label standards?


My new sewing space. I used my Grandmother's screen to divide the room.

Jarvis will have a space next to me 

My newest dump find, I was going to paint it and upcycle. But now it is in the space I think I may just leave it as is. 

Friday, 5 April 2013

TARGETING MY VINTAGE FABRIC STASH


I went through my fabric stash and found this piece of material. I have had it for years and years, it was given to me by my Aunt who was a dressmaker.


 I love red, and as soon as I re-discovered the fabric I thought of making it into a 1950s style full gathered skirt.


The fabric is not with out its faults; it has a section that the print has ‘run’, and through the fabric there are some holes. 


The faults in the fabric is the reason my Aunt gave it to me, her client ended up not wanting to use it. The weight of the fabric is too light to make the style of skirt I am thinking of, but I think if I fully line the skirt it would be enough to weight it and help the skirt to sit, rather than just hang.

However, as soon as Justin saw it he said the print reminded him of the Target logo. 


So I thought I would ask everyone else’s opinion, is the print of the fabric to “Target’ like? Will I look like I am wearing their logo?


Thursday, 7 February 2013

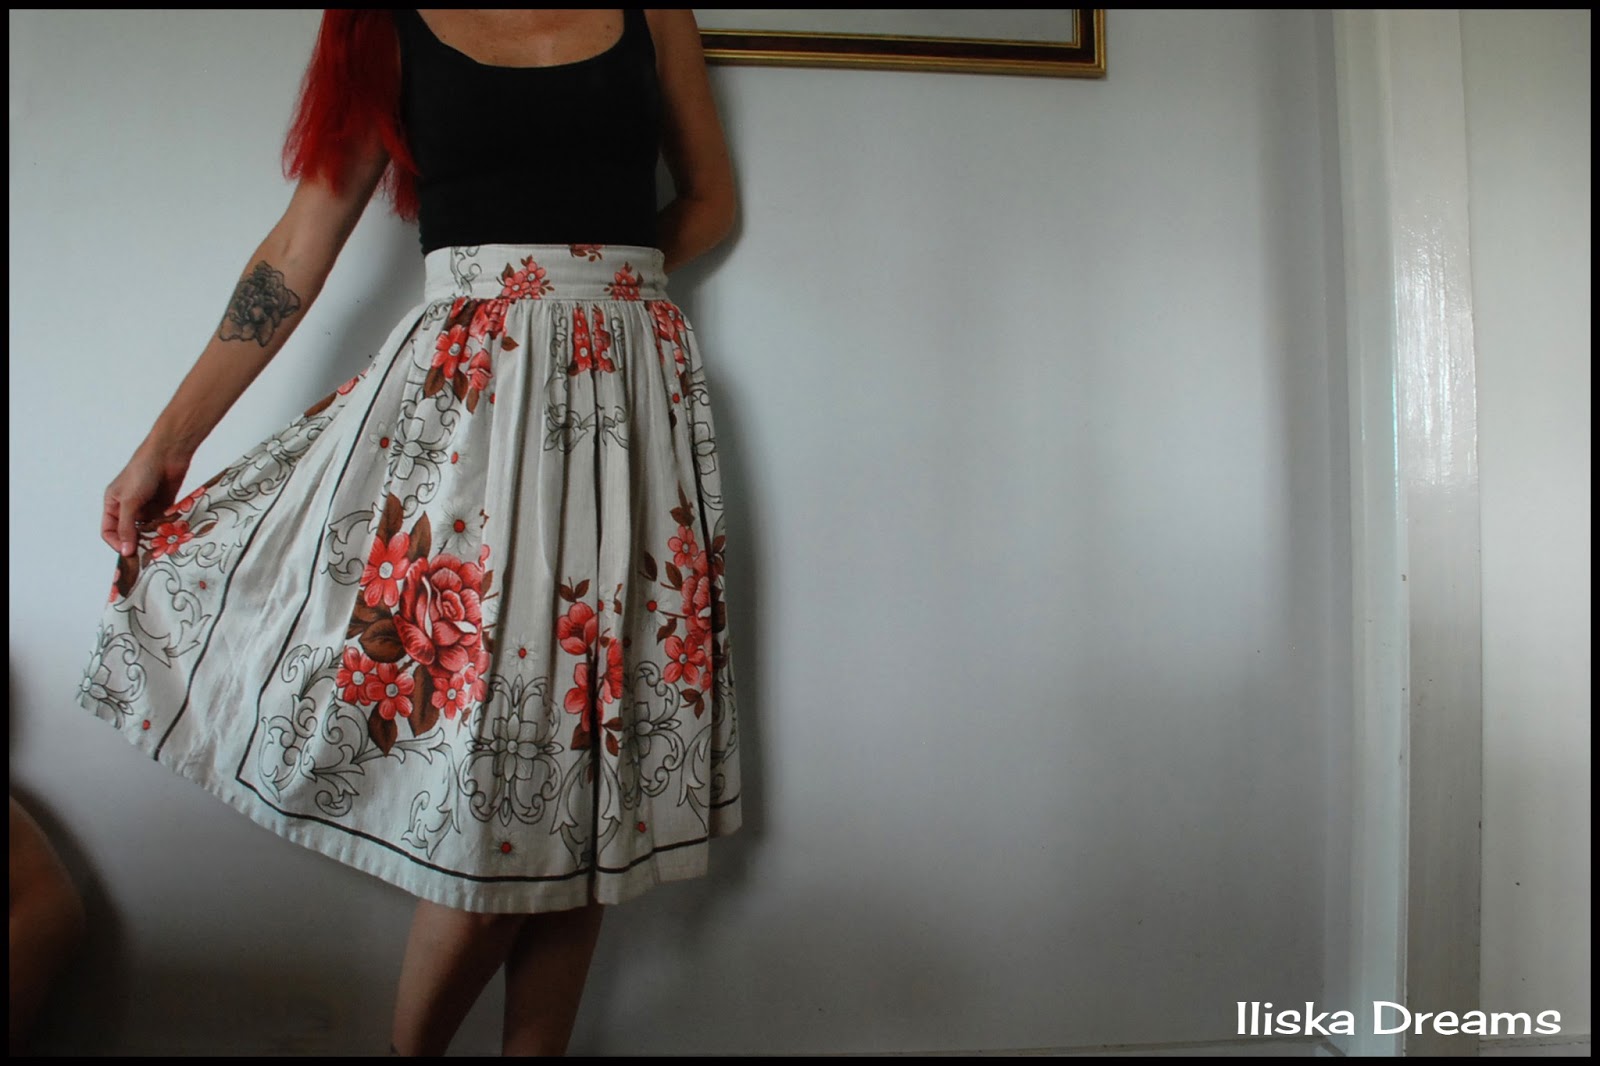
VINTAGE TABLECLOTH SKIRT


I finally fixed my sewing machine. Well, I think I have, bar for a slight issue with tension all is good. Oh, and the fact that after pulling it apart and cleaning it, I have one screw left over. Hmm not sure about that left over screw. Shall I just pretend it does not exist?  Or pull the machine apart once again?


To take the machine for a good test run I made this skirt out of an old tablecloth. I am not one to normally cut up a beautiful vintage tablecloth; however, this had a lot of stains and holes in it. So I did some creative cutting and vola... I have a new skirt.

On a side note, how hard is it to take “selfies” and not feel like a complete idiot. Any advice?

Plus I could have called this post, “Being photo bombed by a naked 14 month old Boy”.


Not looking at the camera does not help in making you feel like less of a poser.


How pretty is the fabric?


Hey Mum, why is the camera on a tripod? And Why are you not taking photos of me?


 Hi, here I am presenting my butt to the world.


Shall I run at the camera? That will get your attention back on me.


Fine, how about a sneaky bum shot?

There were so many more photo bombs by Jarvis, but front on. So, there we have my new skirt and my naked son!